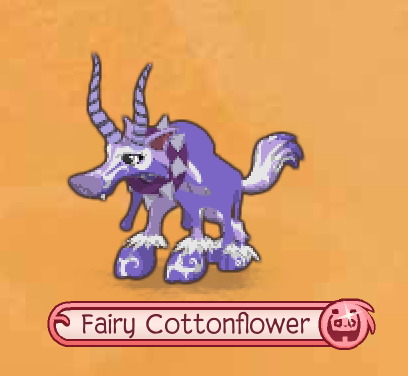
Blogger Tricks Animal Jam Graphic Central!: How to Create Epic Animal Jam Graphics
Showing posts with label How to Create Epic Animal Jam Graphics. Show all posts

Monday, March 21, 2016

How to Create Epic Animal Jam Graphics : Part 3


Hey jammers! It's Panda, with the 3rd installment of the How to Make Epic Animal Jam Graphics 20-part series!

Make sure to check out the introductory post for a refresher on what this series is, as well as the first segment of the series, and the second segment of the series!

Today we'll be covering how to use the instant alpha tool on a Mac to create super quick and easy transparent graphics. I know that several of you have Mac's, and since I too own a Mac and know a couple of handy tricks on how to use it, I thought I'd share them with you! ^.^

Also, I'm sorry that this tutorial isn't too much of a help for those of you who own PC's or other non-Mac computers. However, there are some tips later on in the tutorial that may help some of you who use Photoshop or Pixlr's selection tool.

Ready to start learning?

Okay, let's get started! :D

--------

Materials:

You'll need to open up Mac Preview. (Here's a handy tutorial on how to do that!)

Tutorial:

To create a graphic using this method, you'll want to follow the below steps:
  • Take a screenshot on a non-busy background somewhere in Jamaa.
  • Open up your screenshot in Preview.
  • Then, click on the little toolbox icon to the left of the search bar. 

  • Now, select the "Instant Alpha" tool, which you'll see is represented by a wand-like icon. 

  • Then, drag your mouse around the background of your image. Unfortunately, I lost the screenshot in which I showed this step, but you'll find that the areas you select turn red.
  • With most non-busy backgrounds, you'll find that all the areas in the background that you want to delete will be selected by this tool. If some areas are left out, then you might have to go in with the lasso tool (also found in Preview) or with an eraser brush in Pixlr or Photoshop.
  • Once your background is selected, it will be surrounded in a dotted line. Press the Delete key to remove what you have selected (NOT the Crop button!).


  • Voila!

--------

You'll see the rest of this series coming up in the next few weeks. But here's the schedule again real quick so that you can see what other goodness is coming up:

Day 3: Using the Instant Alpha Tool on a Mac to Get Transparent Graphics  (that's this post!)
Day 4: Using Pixlr to Create Transparent Graphics
Day 5: Using Photoshop to Create Transparent Graphics
Day 6: Creating Colored Background Graphics
Day 7: Using Filters to Change Colors of Graphics
Day 8: Creating Graphic Manipulations/Posters/Thumbnails etc.
Day 9: Creating Sidebar Images
Day 10: Creating Signatures
Day 11: Creating Blog Headers
Day 12: Creating 'Grab My Button' Codes
Day 13: Picking Color Schemes
Day 14: Creating Gradient Text in Photoshop
Day 15: Using Clipping Masks in Photoshop
Day 16: Selecting the Perfect Graphic-Making Images/Locations
Day 17: Creating Graphics of Animals
Day 18: Creating Graphics of Objects/Animals With Busy Backgrounds
Day 19: My Favorite Fonts to Use When Photo-Editing
Day 20: Ways to Use Graphics

Hope that makes you excited! :D

-Panda


Make sure to keep on viewing the blog so that we can reach our goal of 100,000 views by the end of March! I know we can do it! We're only ~ 3,000 views away!

Monday, March 14, 2016

How to Create Epic Animal Jam Graphics : Part 2


Hey jammers! It's Panda, with the 2nd installment of the How to Make Epic Animal Jam Graphics 20-part series!

Since it's been awhile since a segment of this series was posted, make sure to check out the introductory post for a refresher on what this series is, as well as the first segment of the series!

Today we'll be covering the basics of epic graphic making. The whole graphic making thing may seem super complicated and hard at first, but it's actually really easy!

Ready to start learning?

Okay, let's get started! :D

--------

Materials:

You'll want to open up some programs recommended in the first installment of this series to help you create your graphic. I recommend Pixlr.

Also, you'll want to open up the How to Make Graphics presentation I whipped up awhile ago, as I'll be referring to some things in there.

Tips:


  • When using the brush/eraser tool in Pixlr or Photoshop (more about this on slide 9 and 11 in the presentation) make sure to use a smaller brush and/or zoom in to erase particularly small areas. Otherwise, your graphics will just look messy.
  • Always save your transparent (and even non-transparent, for that matter) graphics in PNG format. This ensures that the background is still transparent, and that the image is higher quality.
  • Try to take pictures for your graphics on solid backgrounds, like the ones below (the water/sky in most of the newer dens, grass, as well as the spawning area in Kimbara Outback are both great places for graphics):
Screen Shot 2015-02-26 at 3.59.24 PM.pngScreen Shot 2015-02-26 at 3.58.48 PM.png
  • Always make sure to crop your graphic as tightly around the actual subject as possible. Although extra space around your graphic's subject may just look like an invisible area, it is actually just transparent space that is still part of the image. Having extra fluff, or padding around your graphic will make it harder for you and other people to use it effectively in edits.
--------

You'll see the rest of this series coming up in the next few weeks. But here's the schedule again real quick so that you can see what other goodness is coming up:

Day 2: Basics of Graphic-Making (that's this post!)
Day 3: Using the Instant Alpha Tool on a Mac to Get Transparent Graphics
Day 4: Using Pixlr to Create Transparent Graphics
Day 5: Using Photoshop to Create Transparent Graphics
Day 6: Creating Colored Background Graphics
Day 7: Using Filters to Change Colors of Graphics
Day 8: Creating Graphic Manipulations/Posters/Thumbnails etc.
Day 9: Creating Sidebar Images
Day 10: Creating Signatures
Day 11: Creating Blog Headers
Day 12: Creating 'Grab My Button' Codes
Day 13: Picking Color Schemes
Day 14: Creating Gradient Text in Photoshop
Day 15: Using Clipping Masks in Photoshop
Day 16: Selecting the Perfect Graphic-Making Images/Locations
Day 17: Creating Graphics of Animals
Day 18: Creating Graphics of Objects/Animals With Busy Backgrounds
Day 19: My Favorite Fonts to Use When Photo-Editing
Day 20: Ways to Use Graphics

Hope that makes you excited! :D

-Panda


Make sure to keep on viewing the blog so that we can reach our goal of 100,000 views by the end of March! I know we can do it!

Friday, November 27, 2015

How to Create Epic Animal Jam Graphics : Part 1


Hey jammers! I'm back again today with the very first part in our awesome How to Make Epic Animal Jam Graphics 20-part series! If you didn't see the introduction post yet, make sure to hop on over here to check it out.

Today we'll be covering what tools I use for graphic-making. Wait. Let me rephrase that. We'll be covering all of the tools that I know of that you can use for graphic-making. First I'll share which ones that I use, and then you'll see which other ones you can use.

Sound good?

Okay, let's get started! :D

--------

Tools I Use:

For Graphics:
Photoshop Elements 13 (Paid)
Pixlr (Free)

For Signatures/Headers/Commissions:

 Google Drawings in Google Drive (Free)
Photoshop Elements 13 (Paid)

Other Tools:

PicMonkey (Free)
Gimp (Free)
Photoshop (Paid)
Illustrator (Paid)

--------

You'll see the rest of this series coming up in the next few weeks. But here's the schedule again real quick so that you can see what other goodness is coming up:

Day 1: What Tools I Use for Graphic-Making (that's this post!)
Day 2: Basics of Graphic-Making
Day 3: Using the Instant Alpha Tool on a Mac to Get Transparent Graphics
Day 4: Using Pixlr to Create Transparent Graphics
Day 5: Using Photoshop to Create Transparent Graphics
Day 6: Creating Colored Background Graphics
Day 7: Using Filters to Change Colors of Graphics
Day 8: Creating Graphic Manipulations/Posters/Thumbnails etc.
Day 9: Creating Sidebar Images
Day 10: Creating Signatures
Day 11: Creating Blog Headers
Day 12: Creating 'Grab My Button' Codes
Day 13: Picking Color Schemes
Day 14: Creating Gradient Text in Photoshop
Day 15: Using Clipping Masks in Photoshop
Day 16: Selecting the Perfect Graphic-Making Images/Locations
Day 17: Creating Graphics of Animals
Day 18: Creating Graphics of Objects/Animals With Busy Backgrounds
Day 19: My Favorite Fonts to Use When Photo-Editing
Day 20: Ways to Use Graphics

Hope that makes you excited! :D

-Panda


Make sure to keep on viewing the blog so that we can reach our goal of 90,000 views before 2016! I know we can do it!

Wednesday, November 25, 2015

How to Create Epic Animal Jam Graphics : Introduction


Hey jammers! I'm super pumped to announce the beginning of an epic new series! When I sent out a form a while back asking what kinds of content and tutorials you guys wanted to see, a graphics course was highly requested. But since I don't really collect rares as much as I used to, I didn't think it would be fair for me to demand a price for all of this juicy graphic-making information. So I decided to make it a free series for all of you to enjoy!

A lot of you said that you didn't just want the basics of graphic-making and that you wanted to know EVERYTHING. Filters, different colored backgrounds, transparent backgrounds, animal graphics... everything. Hence this MEGA 20-part series on creating graphics! Also, since I am no longer doing commissions, I thought I'd show all of you how to DIY most of the things that I would have done for you in the commissions!

You'll see this series coming up in the next few weeks. But here's the schedule real quick so that you can see what's coming up:

Introduction (that's this post!)
Day 1: What Tools I Use for Graphic-Making
Day 2: Basics of Graphic-Making
Day 3: Using the Instant Alpha Tool on a Mac to Get Transparent Graphics
Day 4: Using Pixlr to Create Transparent Graphics
Day 5: Using Photoshop to Create Transparent Graphics
Day 6: Creating Colored Background Graphics
Day 7: Using Filters to Change Colors of Graphics
Day 8: Creating Graphic Manipulations/Posters/Thumbnails etc.
Day 9: Creating Sidebar Images
Day 10: Creating Signatures
Day 11: Creating Blog Headers
Day 12: Creating 'Grab My Button' Codes
Day 13: Picking Color Schemes
Day 14: Creating Gradient Text in Photoshop
Day 15: Using Clipping Masks in Photoshop
Day 16: Selecting the Perfect Graphic-Making Images/Locations
Day 17: Creating Graphics of Animals
Day 18: Creating Graphics of Objects/Animals With Busy Backgrounds
Day 19: My Favorite Fonts to Use When Photo-Editing
Day 20: Ways to Use Graphics

Hope that makes you excited! :D

-Panda


 Make sure to keep on viewing the blog so that we can reach our goal of 90,000 views before 2016! I know we can do it!